
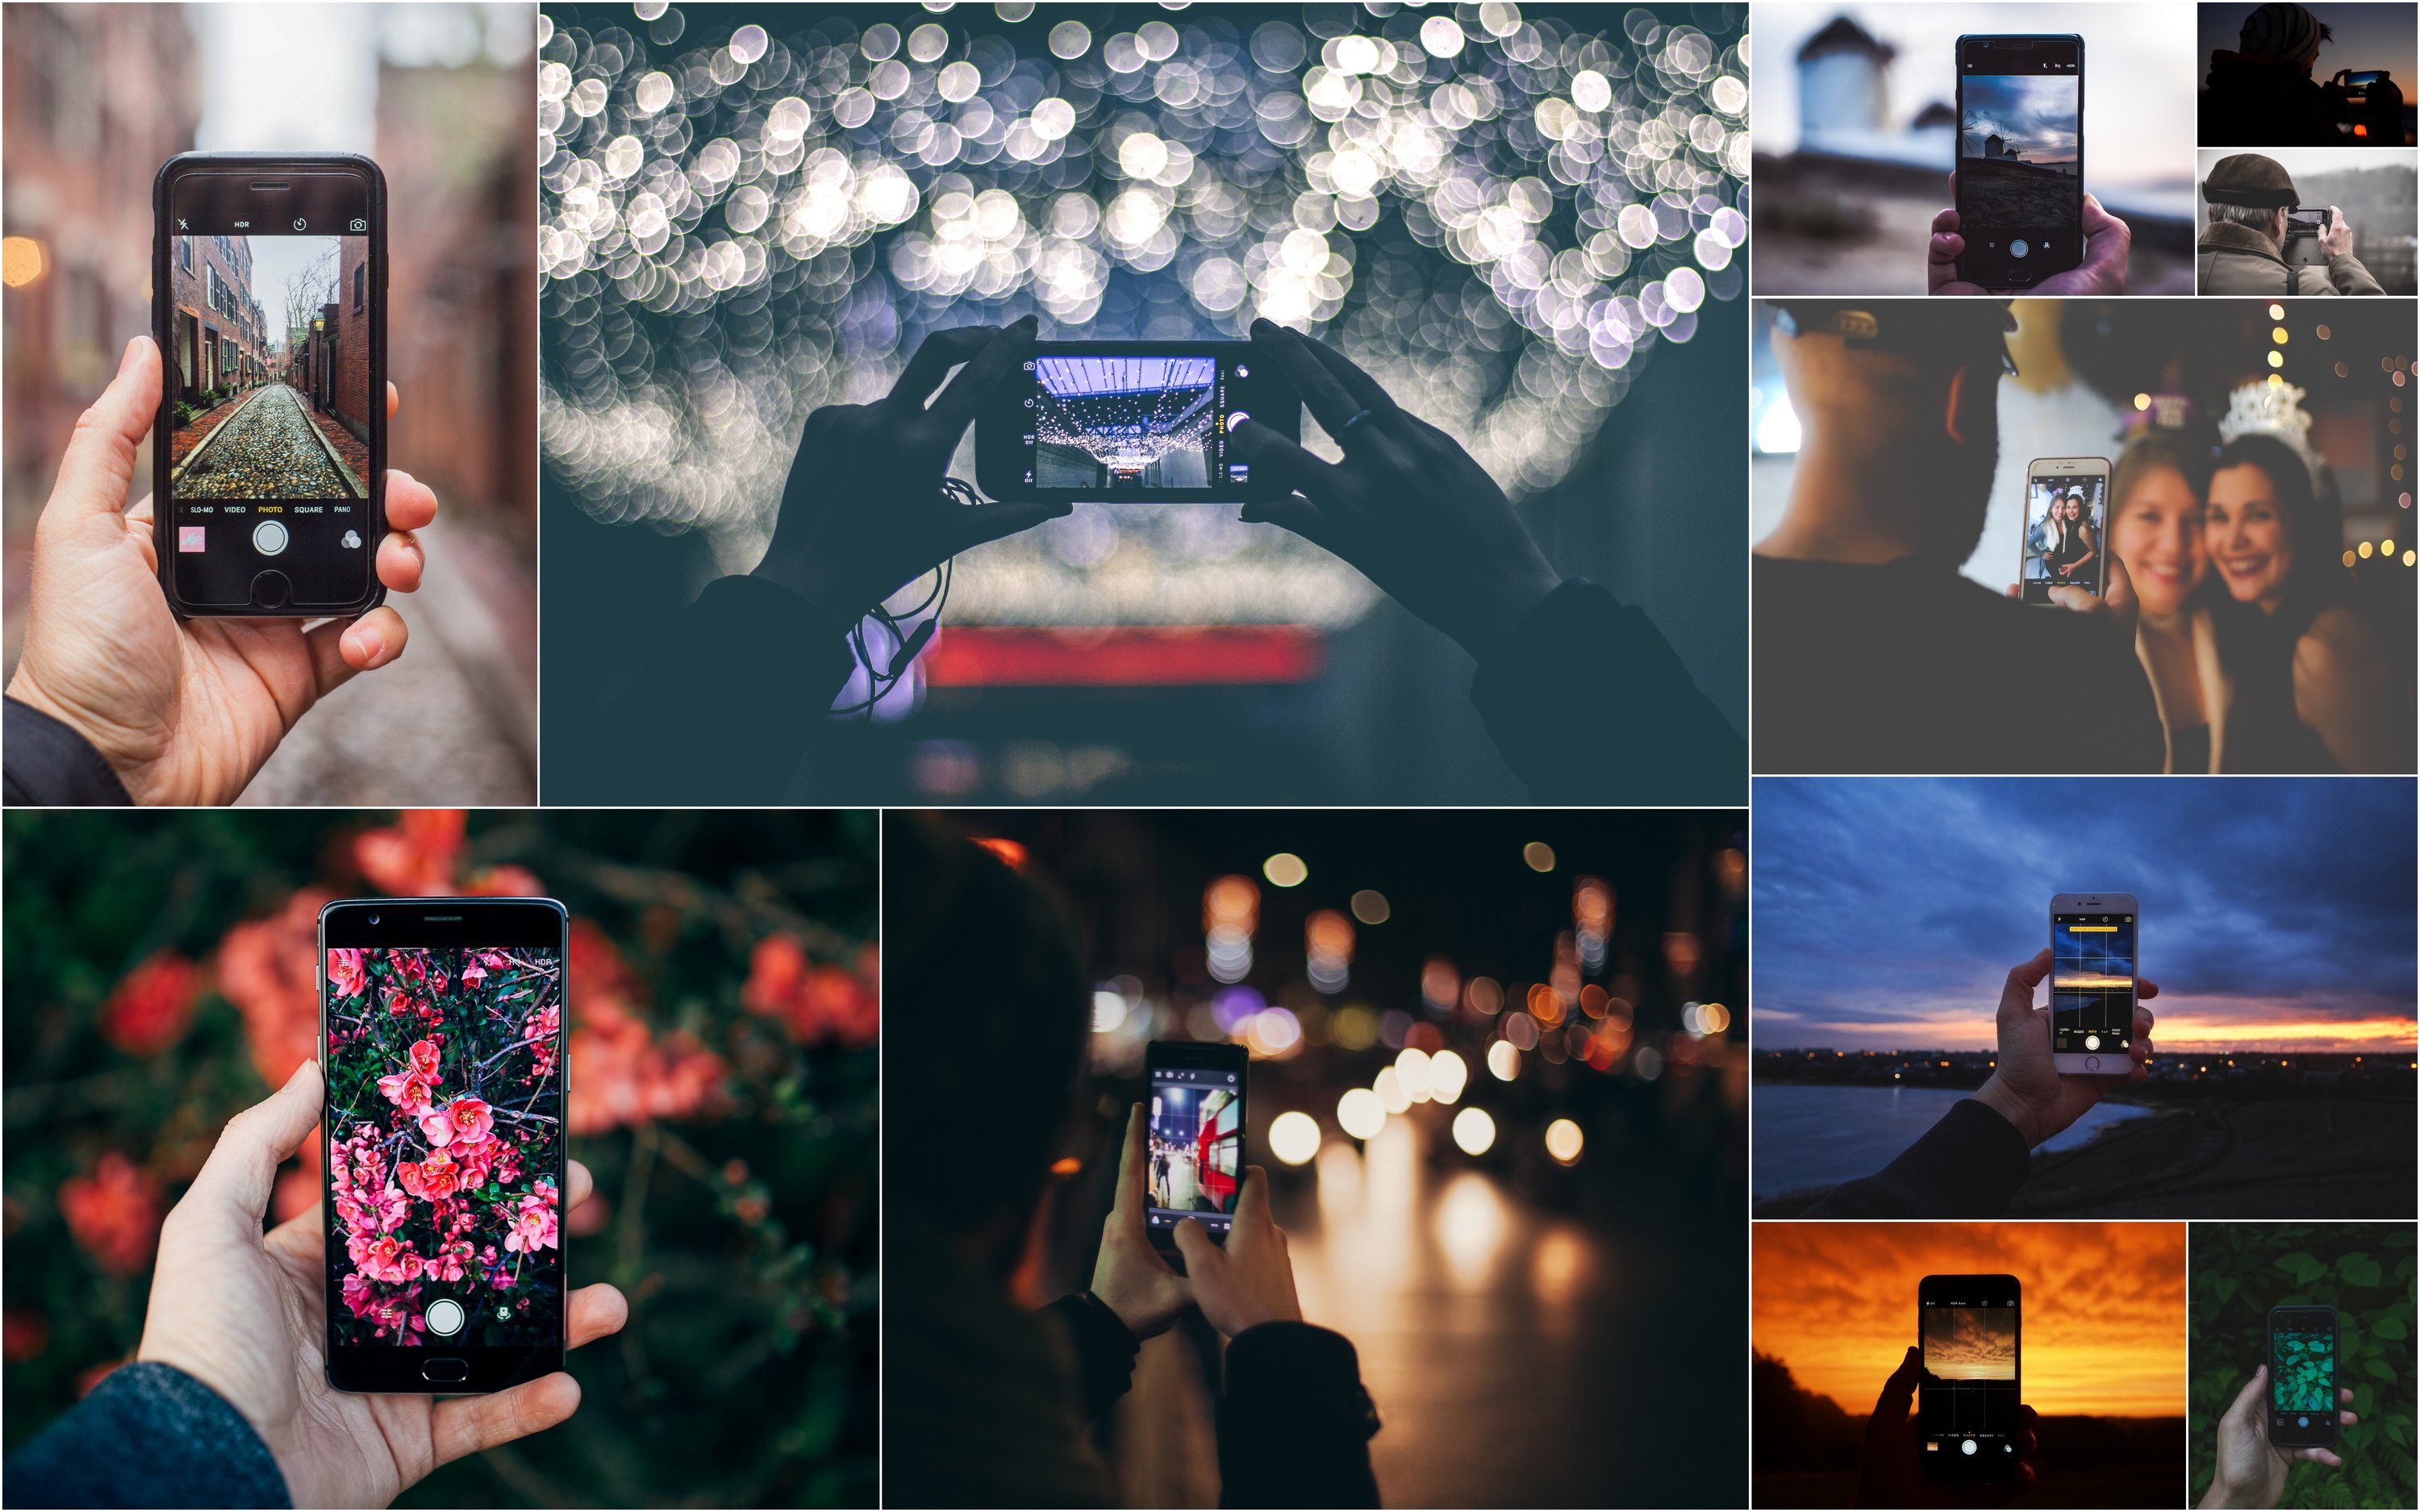

ABOUT ME: People often ask me if I bring my “big camera” everywhere I go. While I probably should, I don’t. Like most of you, I’ve come to rely on my smartphone camera. While my DSLR and pro lenses can do a lot of things that my smartphone can’t, my phone’s camera is just so convenient. It’s always in my pocket or bag and I don’t have to think about keeping an eye on expensive equipment when I’m out and about with my friends and family. Plus, my smartphone does a pretty darn good job of capturing the everyday moments of my life. I’ve put together some of my favorite tips and tricks for making the most out of your smartphone camera. I hope you enjoy them!
Tip 1
Stand still & use two hands for stability
If you feel like your smartphone pictures lack sharpness, the solution could be as simple as holding your camera with two hands and standing still.
We’ve all held our phone out in front of us with one hand to take a picture. Sometimes we even do it while walking. Stop! Whether you’re shooting in portrait or landscape mode, holding the phone in two hands and resting your elbows against your torso for stability will give you the best chance of taking a sharp picture.
The camera shutter isn’t released until you take your thumb off the shutter button on the touch screen. Try pressing the shutter button before you frame your shot and then gently release the button. This is especially helpful when shooting indoors in low light because it eliminates the impact of your finger pressing the button and potentially making the camera shake.Try This: The volume + button on the side of the phone can also be used to release the shutter and greatly decrease camera shake.

Tip 2
Look for the light
With the limited setting on smartphone cameras, the amount of available light also plays a part in taking sharp pictures. The more light there is, the better your smartphone camera will be able to combat shutter lag and freeze motion. It’s difficult to take a sharp picture of a baby crawling in a dim living room but if you move outside during the day, you’ll get a nice sharp image. If you want sharper, less blurry pictures go somewhere with good, natural (from the sun, not a lamp or overhead light) light. You don’t necessarily have to go outside. Move close to a window or an open door.
Good light makes all the difference between a mediocre and a great photo. I would go as far as to say that good light is more important than an interesting background or subject. If you’re shooting a portrait, avoid sunny and direct light on faces. This kind of light causes harsh shadows and squinting. If this is the kind of light you have to work with, try putting the sun behind your subject. This will give you the opportunity to play with sunflare and create backlit images. When possible, look for open shade along the side of a building or under a tree.Try This: Put the sun both in front of and behind your subject and compare the two images to see what a difference the right lighting can make to an image.

Tip 3
Turn off your flash
While the flash on smart phones has improved quite a bit over the years, you can’t change the fact that it’s just a small and not very powerful LED light. If you're shooting at night, use the camera app's exposure slider to brighten the photo (see Tip 6).
Try This: Take a photo in low light and then take the same photo using the exposure slider to compare.

Tip 4
Use burst mode for action shots
Burst mode is great for when you are trying to photograph a moving subject such as a running animal or toddler or a someone playing a sport. By snapping images in quick succession, you're more likely to get a shot that’s in focus and you may even have several keepers to chose from.
Burst Mode is available on iPhone 5s and up. To access it, just hold down the shutter button (or volume + button) and the iPhone will continuously take pictures until you lift your finger again.
Try This: While holding down the shutter button, you'll see a counter at the bottom of the screen that tells you how many images you’ve taken.

Tip 5
Touch your camera screen where you want to focus
Chances are, at one time or another you’ve had your smartphone camera focus on something other than what you would like to focus on. To prevent this, tap and hold on the spot you want the camera to focus until you see the yellow AE/AF Lock alert. Once that pops up, the automatic exposure metering and automatic focus metering have been locked on your subject.
Try This: Take one image without locking focus - then try pressing your screen to lock focus.

Tip 6
Slide the exposure meter to lighten and darken images
When you point your camera at a subject or scene, it does it’s best to get you a properly exposed image. You’ve probably noticed though that sometimes it does better job than others. Sometimes our smartphone cameras want to make our images too dark (underexposed) and sometimes they’re too bright (overexposed) When this happens, you can fix it before taking the picture by adjusting the yellow exposure slider next to the focus square. Just tap the spot on the phone screen where you want to change the exposure and then use the sun icon to increase (slide up) or decrease (slide down) the exposure.
Try This: Take a photo at Sunset and increase the exposure by tapping on the screen.

Tip 7
Turn on HDR Auto
You can manually turn HDR on or off from the Camera app, but if you have an iPhone 5s or newer, you can just switch it into HDR Auto mode. In HDR Auto, when you point your camera at something, the iPhone's camera sensor will determine if the image might need HDR correction.
Try this: Take a photo without HDR and then take the same image again using HDR. Compare the images side by side to see the difference.

Tip 8
Don't take every image from the same spot
Composition is one of the most important aspects of photography and also, probably one of the most taken for granted. How you frame your subject and compose your shot ultimately determines how memorable and interesting it is.
A lot of times, we see something that we want to take a picture of and take 15 images of the same thing. Moving a few feet to the right or to the left, getting higher and getting lower can totally change an image and give you a series of unique and interesting images instead of dozens that are almost identical.
Changing your perspective can also help eliminate distracting background elements like cars and other people. It’s important to pay attention to the whole scene. Nothing ruins a portrait faster than a lamp post or street sign coming out of the top of your subjects head! A few steps to the right or left or getting a little higher or lower is all you have to do to get rid of distracting background elements.
Try This: Take a photo - then move a few steps one way to try and eliminate distractions in the background. Compare the images to see how a few steps makes a big difference.

Tip 9
Get close And get closer
Sometimes the surroundings are part of the story and we want to include them in the image. Your best friend in front of the Eiffel Tower, your daughter playing in the waves at the beach, etc...Sometimes the surroundings aren’t important though and can actually be distracting. Are we looking at the couch? The clutter on the coffee table? Is it the car in the background? Or is it that cute baby? Getting close to our subjects and filling the frame with them can make the resulting image more intimate and help clearly define them as the focus.
Try this: Stand where you would normally stand to take a picture and take one. Now take two steps closer. Take another shot. Now, try getting as close as your smartphone camera will allow you to get and take another. Look at your shots. Which is your favorite?
Tip 10
Use an editing app to make your photos pop
There are a lot of apps on the market that can be used to edit images on your smartphone. Many people use Instagram or other apps that apply filters to the entire image. While there is nothing wrong with using filters, if you’re putting them on top of an image that is not exposed properly or with incorrect white balance (color) your picture won’t look as good as it could. Two of my favorite editing apps are Snapseed and PicTapGo. Snapseed allows you to correct exposure and color for the entire image or to make adjustments to specific parts. PicTapGo includes filters that correct exposure, contrast and color.
Try this: Take your favorite iPhone photo and run it through one of the apps above. Share your photo with others to see what they think!

Gallery
Click/tap to view larger


Video
Watch the video to learn more about how Sarah Cho Photography can tell your families story
MORE THAN A SELFIE
Are you in your family portraits?
The convenience of having a pretty good camera with us at all times truly has changed how we capture the story of our lives. There are moments when handing off your phone to a friend, or taking a selfie will do. But there are other moments when it's best to hire a professional.
We love working with our clients to beautifully capture the milestones in your life and to create artwork for your home to showcase these moments for years to come.
Want to learn more?
Click the link below to schedule a free 15-minute phone consultation to discuss our different portrait sessions, and exclusive printing options..